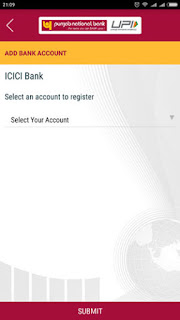
Punjab National Bank (PNB) UPI apps is the open mobile platform where customer of any bank can fetch and place all his accounts maintained with different banks and transact through these accounts.
PNB UPI apps allows you to instant transfer of money between any two parties via smart phone through VPA (Virtual Payment Address) or Account number +IFSC.
How To Download and Install the PNB UPI Apps ?
Follow the below mention instruction to download and install the PNB UPI Apps
How To register in the PNB UPI application?
1. Download PNB UPI apps through Google Play store Here
2. After Installation tap CLICK ME to verify your mobile number.
3. A silent SMS will be sent from your mobile for verification. The SMS should be sent from the mobile number registered with the bank accounts. In case of dual- SIM phones, please ensure the SMS is delivered from the mobile number registered with the bank (Please keep the registered SIM in the 1st slot).
4. After your mobile number is verified, the New Registration screen is displayed. Fill in the required details.
5. Create six digits numeric password for logging in to application and confirm the same.
Learn : How To Download and Install SBI UPI Apps ?
Create PNB VPA for UPI Fund Transfer
Virtual Payment Address (VPA) is created for your existing bank account which acts as a unique identifier to be used for performing the transactions. There is no need to have PNB specific bank account for creating VPA. To send money, you just need to enter the virtual address of the beneficiary. The beneficiary need not show account details as only Virtual address is required for the transactions.
How to create your VPA using PNB UPI Apps?
1. Click on UPI Icon on your PNB Apps through ’ home screen of your Android Phone
2. Go to 'Manage' and select 'Add my Bank Accounts'.
3. Enter your desired prefix, for e.g. raj@PNB and check for the availability.
4. Click on 'Continue' and select your bank. If you intend to link multiple bank accounts with the same VPA, you can set a default account.
5. Generate MPIN. This MPIN will be used to transact through this account.
How To Send and Receive Money Through PNB UPI Apps ?
- After adding bank account, generate virtual address and set UPI PIN for authenticating transactions.
- Click on Pay.
- If you choose to transact using Virtual Address, enter valid virtual address of the beneficiary. The beneficiary must be registered with UPI.
- If you choose to transact through IFSC code and bank account number, enter the required details. In such case, the beneficiary need not register with UPI.
- To ask for money from friends, use Collect Money option, enter the payer details and click collect money
- To approve collect money requests raised by friends, click Pending approval option.

Features of PNB UPI Apps
Following are the transaction sets supported
• User profile registration
• Bank accounts creation
• Payment address creation
• Authentication
• Authorization
• PIN generation
Core transaction functionality
• Pay request
• Collect request
• Collect request approval (Payer approval through Mobile application)
• Debiting / Crediting Payer / Payee accounts
• Virtual address resolution for NPCI-UPI
• Support for all 2-party, 3-party and 4-party models of NPCI UPI
• Third party address book management
What are the requirements for using UPI?
You should have following:
· An android phone with internet services
· An operative bank account
· The mobile number being registered with UPI, must be linked to the bank account.
· Active debit card relating to this account for creating mPIN.
Contact for Failed Transaction, Refund of Money Through PNB UPI Apps
- Click on Txn status to track the transactions.
- If you have any concerns, select the particular transaction and log the complaint by writing the relevant comment for it.
- You can further check its status from `Complaint Status` menu.


No comments:
Post a Comment